Interceptor: Difference between revisions
m (Added Description) |
No edit summary |
||
| Line 1: | Line 1: | ||
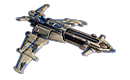
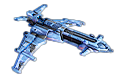
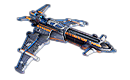
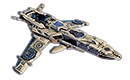
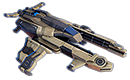
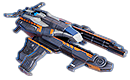
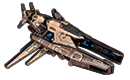
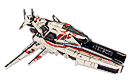
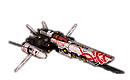
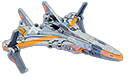
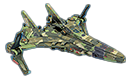
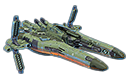
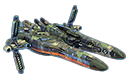
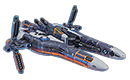
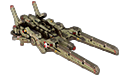
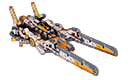
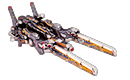
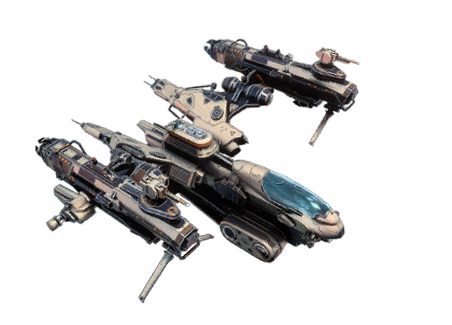
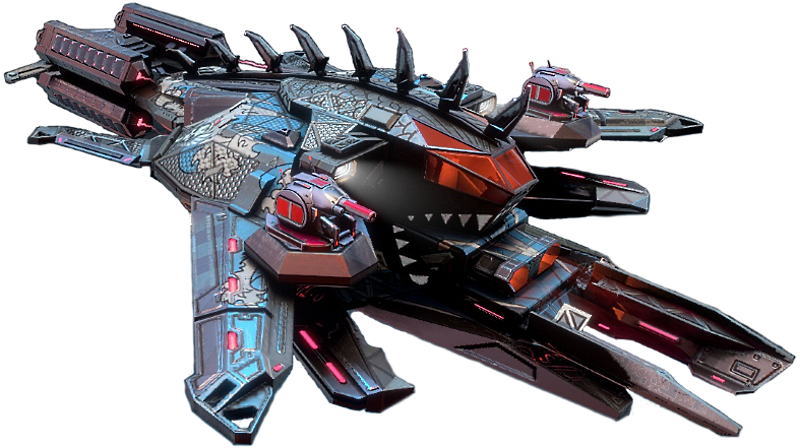
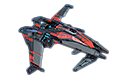
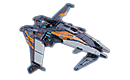
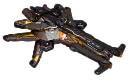
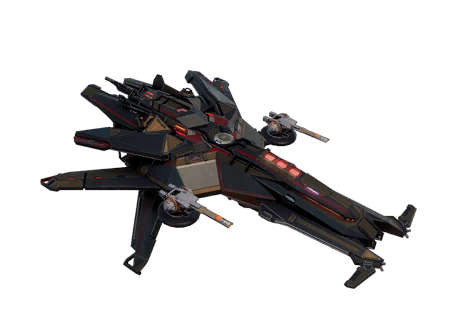
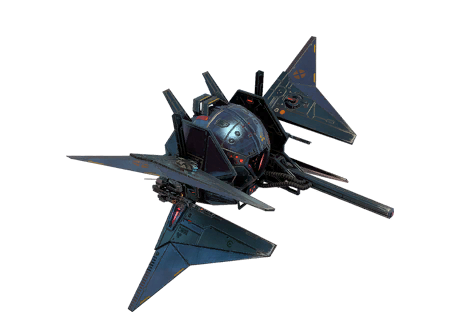
Interceptors are small, but very effective ships. It was designed for reconnaissance, electronic countermeasures or dealing damage to individual enemy ships. Armed with two guns and missiles. | |||
Interceptors are small, | |||
==Roles== | |||
===Recon=== | |||
[[File:Recon.png|50px]][[Recon]] ships must infiltrate the enemy ranks and identify the locations of their ships. A special module allows them to move around the battlefield quickly, and their active modules allow them to detect enemy ships, including the invisible ones, and track locations of individual ships. In addition, Recon ships can briefly become invisible and sabotage the enemy's shields. They boast increased radar range and key objects capture speed. Recon ship pilots also receive additional rewards for all damage done to those targets identified by them. | |||
===ECM=== | |||
[[File:ECM.png|50px]][[ECM]] ships are meant to use their active modules to interfere with the normal operation of enemy ships. | |||
A special module can temporarily disable the systems of nearby ships, while making the ship impenetrable to return fire. Active modules can also impede the movement of enemy ships, as well as their use of weapons and combat systems. ECM ships can be used to drain the enemy's energy reserves. An ECM ship is always an important target for any enemy ships, so they have better defences. | |||
===Covert Ops=== | |||
[[File:Covert Ops.png|50px]][[Covert Ops]] ships are designed for sudden hit and run attacks on individual enemy ships. A special plasma web allows these ships to cause damage to the enemy without any direct contact whatsoever, while the ship's guidance system grants more critical hits. Active modules can temporarily increase damage done by the main weapons, as well as prevent the enemy from locking on your ship. | |||
==Advice== | |||
==Factions== | |||
===Empire=== | |||
<!--Empire--> | |||
<div style="border-radius: 4px; border: 1px solid #8E8E8E; background-color: #BFBFBF; margin: 0 0 10px; padding: 8px;"> | |||
<div style="margin: 5px 25px 10px 5px; display: inline-block; vertical-align: top; text-align: center;"> | |||
[[File:Dvergr.png|link=Dvergr]]<br>II [[File:recon.png|20px]] [[Dvergr]] | |||
</div> | |||
<div style="margin: 5px 25px 10px 5px; display: inline-block; vertical-align: top; text-align: center;"> | |||
[[File:Dvergr_2.png|link=Dvergr 2]]<br>III [[File:recon.png|20px]] [[Dvergr 2]] | |||
</div> | |||
<div style="margin: 5px 25px 10px 5px; display: inline-block; vertical-align: top; text-align: center;"> | |||
[[File:King_Dvergr.png|link=King Dvergr]]<br>III [[File:recon.png|20px]] [[King Dvergr]] [[File:GS.png]] | |||
</div> | |||
<div style="margin: 5px 25px 10px 5px; display: inline-block; vertical-align: top; text-align: center;"> | |||
[[File:Dvergr_Knight.png|link=Dvergr Knight]]<br>IV [[File:recon.png|20px]] [[Dvergr Knight]] | |||
</div> | |||
<div style="margin: 5px 25px 10px 5px; display: inline-block; vertical-align: top; text-align: center;"> | |||
[[File:Neutron.png|link=Neutron]]<br>V [[File:ECM.png|20px]] [[Neutron]] | |||
</div> | |||
<div style="margin: 5px 25px 10px 5px; display: inline-block; vertical-align: top; text-align: center;"> | |||
[[File:Dwarf_2.png|link=Dwarf 2]]<br>VI [[File:recon.png|20px]] [[Dwarf 2]] | |||
</div> | |||
<div style="margin: 5px 25px 10px 5px; display: inline-block; vertical-align: top; text-align: center;"> | |||
[[File:Scout.png|link=Scout]]<br>VI [[File:recon.png|20px]] [[Scout]] [[File:GS.png]] | |||
</div> | |||
<div style="margin: 5px 25px 10px 5px; display: inline-block; vertical-align: top; text-align: center;"> | |||
[[File:Wasp.png|link=Wasp]]<br>VI [[File:recon.png|20px]] [[Wasp]] [[File:GS.png]] | |||
</div> | |||
<div style="margin: 5px 25px 10px 5px; display: inline-block; vertical-align: top; text-align: center;"> | |||
[[File:Diamond_Dwarf.png|link=Diamond Dwarf]]<br>VII [[File:recon.png|20px]] [[Diamond Dwarf]] | |||
</div> | |||
<div style="margin: 5px 25px 10px 5px; display: inline-block; vertical-align: top; text-align: center;"> | |||
[[File:Swarm.png|link=Swarm]]<br>VIII [[File:recon.png|20px]] [[Swarm]] | |||
</div> | |||
<div style="margin: 5px 25px 10px 5px; display: inline-block; vertical-align: top; text-align: center;"> | |||
[[File:Grim.png|link=Grim]]<br>VIII [[File:ECM.png|20px]] [[Grim]] [[File:GS.png]] | |||
</div> | |||
<div style="margin: 5px 25px 10px 5px; display: inline-block; vertical-align: top; text-align: center;"> | |||
[[File:Black_Swarm.png|link=Black Swarm]]<br>IX [[File:ECM.png|20px]] [[Black Swarm]] | |||
</div> | |||
<div style="margin: 5px 25px 10px 5px; display: inline-block; vertical-align: top; text-align: center;"> | |||
[[File:Deimon.png|link=Deimon]]<br>IX [[File:recon.png|20px]] [[Deimon]] [[File:GS.png]] | |||
</div> | |||
<div style="margin: 5px 25px 10px 5px; display: inline-block; vertical-align: top; text-align: center;"> | |||
[[File:Magnetar.png|link=Magnetar]]<br>X [[File:ECM.png|20px]] [[Magnetar]] | |||
</div> | |||
<div style="margin: 5px 25px 10px 5px; display: inline-block; vertical-align: top; text-align: center;"> | |||
[[File:Tempest.png|link=Tempest]]<br>XI [[File:ECM.png|20px]] [[Tempest]] | |||
</div> | |||
<div style="margin: 5px 25px 10px 5px; display: inline-block; vertical-align: top; text-align: center;"> | |||
[[File:Nibelung.png|link=Nibelung]]<br>XI [[File:recon.png|20px]] [[Nibelung]] | |||
</div> | |||
<div style="margin: 5px 25px 10px 5px; display: inline-block; vertical-align: top; text-align: center;"> | |||
[[File:King_Nibelung.png|link=King Nibelung]]<br>XII [[File:recon.png|20px]] [[King Nibelung]] | |||
</div> | |||
<div style="margin: 5px 25px 10px 5px; display: inline-block; vertical-align: top; text-align: center;"> | |||
[[File:Leonina.png|link=Leonina]]<br>XII [[File:recon.png|20px]] [[Leonina]] [[File:GS.png]] | |||
</div> | |||
<div style="margin: 5px 25px 10px 5px; display: inline-block; vertical-align: top; text-align: center;"> | |||
[[File:Viking.png|link=Viking]]<br>XIII [[File:recon.png|20px]] [[Viking]] | |||
</div> | |||
<div style="margin: 5px 25px 10px 5px; display: inline-block; vertical-align: top; text-align: center;"> | |||
[[File:Storm_Viking.png|link=Storm Viking]]<br>XIV [[File:ECM.png|20px]] [[Storm Viking]] | |||
</div> | |||
<div style="margin: 5px 25px 10px 5px; display: inline-block; vertical-align: top; text-align: center;"> | |||
[[File:Jarl.png|link=Jarl]]<br>XV [[File:recon.png|20px]] [[Jarl]] | |||
</div> | |||
<div style="margin: 5px 25px 10px 5px; display: inline-block; vertical-align: top; text-align: center;"> | |||
[[File:Berserker.png|link=Berserker]]<br>XV [[File:recon.png|20px]] [[Berserker]] | |||
</div> | |||
<div style="margin: 5px 25px 10px 5px; display: inline-block; vertical-align: top; text-align: center;"> | |||
[[File:Cyning.png|link=Cyning]]<br>XV [[File:recon.png|20px]] [[Cyning]] | |||
</div> | |||
</div> | |||
<!--/Empire--> | |||
===Federation=== | |||
<!--Federation--> | |||
<div style="border-radius: 4px; border: 1px solid #8E8E8E; background-color: #BFBFBF; margin: 0 0 10px; padding: 8px;"> | |||
<div style="margin: 5px 25px 10px 5px; display: inline-block; vertical-align: top; text-align: center;"> | |||
[[File:Swift_2.png|link=Swift]]<br>III [[File:Covert Ops.png|20px]] [[Swift]] | |||
</div> | |||
<div style="margin: 5px 25px 10px 5px; display: inline-block; vertical-align: top; text-align: center;"> | |||
[[File:Kite-E.png|link=Kite-E]]<br>III [[File:Covert Ops.png|20px]] [[Kite-E]] [[File:GS.png]] | |||
</div> | |||
<div style="margin: 5px 25px 10px 5px; display: inline-block; vertical-align: top; text-align: center;"> | |||
[[File:Swift-M.png|link=Swift-M]]<br>IV [[File:Covert Ops.png|20px]] [[Swift-M]] | |||
</div> | |||
<div style="margin: 5px 25px 10px 5px; display: inline-block; vertical-align: top; text-align: center;"> | |||
[[File:Hawk.png|link=Hawk]]<br>VI [[File:recon.png|20px]] [[Hawk]] | |||
</div> | |||
<div style="margin: 5px 25px 10px 5px; display: inline-block; vertical-align: top; text-align: center;"> | |||
[[File:Swift_Mk_3.png|link=Swift Mk 3]]<br>VI [[File:Covert Ops.png|20px]] [[Swift Mk 3]] | |||
</div> | |||
<div style="margin: 5px 25px 10px 5px; display: inline-block; vertical-align: top; text-align: center;"> | |||
[[File:Blade_of_Aressa.png|link=Blade of Aressa]]<br>VI [[File:Covert Ops.png|20px]] [[Blade of Aressa]] [[File:GS.png]] | |||
</div> | |||
<div style="margin: 5px 25px 10px 5px; display: inline-block; vertical-align: top; text-align: center;"> | |||
[[File:Superkite.png|link=Superkite]]<br>VI [[File:Covert Ops.png|20px]] [[Superkite]] [[File:GS.png]] | |||
</div> | |||
<div style="margin: 5px 25px 10px 5px; display: inline-block; vertical-align: top; text-align: center;"> | |||
[[File:Hawk-eye.png|link=Hawk-eye]]<br>VII [[File:recon.png|20px]] [[Hawk-eye]] | |||
</div> | |||
<div style="margin: 5px 25px 10px 5px; display: inline-block; vertical-align: top; text-align: center;"> | |||
[[File:Hawk-M.png|link=Hawk-M]]<br>VIII [[File:Covert Ops.png|20px]] [[Hawk-M]] | |||
</div> | |||
<div style="margin: 5px 25px 10px 5px; display: inline-block; vertical-align: top; text-align: center;"> | |||
[[File:Kite_2.png|link=Kite]]<br>IX [[File:Covert Ops.png|20px]] [[Kite]] | |||
</div> | |||
<div style="margin: 5px 25px 10px 5px; display: inline-block; vertical-align: top; text-align: center;"> | |||
[[File:Eagle-B.png|link=Eagle-B]]<br>IX [[File:Covert Ops.png|20px]] [[Eagle-B]] [[File:GS.png]] | |||
</div> | |||
<div style="margin: 5px 25px 10px 5px; display: inline-block; vertical-align: top; text-align: center;"> | |||
[[File:Sai.png|link=Sai]]<br>IX [[File:recon.png|20px]] [[Sai]] [[File:GS.png]] | |||
</div> | |||
<div style="margin: 5px 25px 10px 5px; display: inline-block; vertical-align: top; text-align: center;"> | |||
[[File:Black_Bomber.png|link=Black Bomber]]<br>X [[File:recon.png|20px]] [[Black Bomber]] | |||
</div> | |||
<div style="margin: 5px 25px 10px 5px; display: inline-block; vertical-align: top; text-align: center;"> | |||
[[File:Kite-M.png|link=Kite-M]]<br>X [[File:Covert Ops.png|20px]] [[Kite-M]] | |||
</div> | |||
<div style="margin: 5px 25px 10px 5px; display: inline-block; vertical-align: top; text-align: center;"> | |||
[[File:Swift_Eagle.png|link=Swift Eagle]]<br>XI [[File:recon.png|20px]] [[Swift Eagle]] | |||
</div> | |||
<div style="margin: 5px 25px 10px 5px; display: inline-block; vertical-align: top; text-align: center;"> | |||
[[File:Eagle.png|link=Eagle]]<br>XI [[File:Covert Ops.png|20px]] [[Eagle]] | |||
</div> | |||
<div style="margin: 5px 25px 10px 5px; display: inline-block; vertical-align: top; text-align: center;"> | |||
[[File:Eagle-M.png|link=Eagle-M]]<br>XII [[File:Covert Ops.png|20px]] [[Eagle-M]] | |||
</div> | |||
<div style="margin: 5px 25px 10px 5px; display: inline-block; vertical-align: top; text-align: center;"> | |||
[[File:Konkistador.png|link=Konkistador]]<br>XII [[File:Covert Ops.png|20px]] [[Konkistador]] [[File:GS.png]] | |||
</div> | |||
<div style="margin: 5px 25px 10px 5px; display: inline-block; vertical-align: top; text-align: center;"> | |||
[[File:Grey_Falcon.png|link=Grey Falcon]]<br>XIII [[File:Covert Ops.png|20px]] [[Grey Falcon]] | |||
</div> | |||
<div style="margin: 5px 25px 10px 5px; display: inline-block; vertical-align: top; text-align: center;"> | |||
[[File:Spectre_Falcon.png|link=Spectre Falcon]]<br>XIV [[File:recon.png|20px]] [[Spectre Falcon]] | |||
</div> | |||
<div style="margin: 5px 25px 10px 5px; display: inline-block; vertical-align: top; text-align: center;"> | |||
[[File:Falcon-M.png|link=Falcon-M]]<br>XV [[File:Covert Ops.png|20px]] [[Falcon-M]] | |||
</div> | |||
<div style="margin: 5px 25px 10px 5px; display: inline-block; vertical-align: top; text-align: center;"> | |||
[[File:Golden_Eagle.png|link=Golden Eagle]]<br>XI [[File:Covert Ops.png|20px]] [[Golden Eagle]] [[File:GS.png]] | |||
</div> | |||
<div style="margin: 5px 25px 10px 5px; display: inline-block; vertical-align: top; text-align: center;"> | |||
[[File:Peregrine.png|link=Peregrine]]<br>XV [[File:Covert Ops.png|20px]] [[Peregrine]] | |||
</div> | |||
</div> | |||
<!--/Federation--> | |||
===Jericho=== | |||
<!--Jericho--> | |||
<div style="border-radius: 4px; border: 1px solid #8E8E8E; background-color: #BFBFBF; margin: 0 0 10px; padding: 8px;"> | |||
<div style="margin: 5px 25px 10px 5px; display: inline-block; vertical-align: top; text-align: center;"> | |||
[[File:Dagger.png|link=Dagger]]<br>III [[File:ECM.png|20px]] [[Dagger]] | |||
</div> | |||
<div style="margin: 5px 25px 10px 5px; display: inline-block; vertical-align: top; text-align: center;"> | |||
[[File:Black_Death.png|link=Black Death]]<br>III [[File:ECM.png|20px]] [[Black Death]] | |||
</div> | |||
<div style="margin: 5px 25px 10px 5px; display: inline-block; vertical-align: top; text-align: center;"> | |||
[[File:Dagger_AE.png|link=Dagger AE]]<br>IV [[File:ECM.png|20px]] [[Dagger AE]] | |||
</div> | |||
<div style="margin: 5px 25px 10px 5px; display: inline-block; vertical-align: top; text-align: center;"> | |||
[[File:Dagger_V.png|link=Dagger V]]<br>V [[File:Covert Ops.png|20px]] [[Dagger V]] | |||
</div> | |||
<div style="margin: 5px 25px 10px 5px; display: inline-block; vertical-align: top; text-align: center;"> | |||
[[File:Stiletto.png|link=Stiletto]]<br>VI [[File:ECM.png|20px]] [[Stiletto]] | |||
</div> | |||
<div style="margin: 5px 25px 10px 5px; display: inline-block; vertical-align: top; text-align: center;"> | |||
[[File:Talon.png|link=Talon]]<br>VI [[File:ECM.png|20px]] [[Talon]] | |||
</div> | |||
<div style="margin: 5px 25px 10px 5px; display: inline-block; vertical-align: top; text-align: center;"> | |||
[[File:Stiletto_AE.png|link=Stiletto AE]]<br>VII [[File:ECM.png|20px]] [[Stiletto AE]] | |||
</div> | |||
<div style="margin: 5px 25px 10px 5px; display: inline-block; vertical-align: top; text-align: center;"> | |||
[[File:Kris.png|link=Kris]]<br>VIII [[File:ECM.png|20px]] [[Kris]] | |||
</div> | |||
<div style="margin: 5px 25px 10px 5px; display: inline-block; vertical-align: top; text-align: center;"> | |||
[[File:Ricasso.png|link=Ricasso]]<br>VIII [[File:Covert Ops.png|20px]] [[Ricasso]] | |||
</div> | |||
<div style="margin: 5px 25px 10px 5px; display: inline-block; vertical-align: top; text-align: center;"> | |||
[[File:Kris_AE.png|link=Kris AE]]<br>IX [[File:ECM.png|20px]] [[Kris AE]] | |||
</div> | |||
<div style="margin: 5px 25px 10px 5px; display: inline-block; vertical-align: top; text-align: center;"> | |||
[[File:Spirit.png|link=Spirit]]<br>IX [[File:ECM.png|20px]] [[Spirit]] | |||
</div> | |||
<div style="margin: 5px 25px 10px 5px; display: inline-block; vertical-align: top; text-align: center;"> | |||
[[File:Nyx.png|link=Nyx]]<br>IX [[File:Covert Ops.png|20px]] [[Nyx]] | |||
</div> | |||
<div style="margin: 5px 25px 10px 5px; display: inline-block; vertical-align: top; text-align: center;"> | |||
[[File:Kris_S.png|link=Kris S]]<br>X [[File:Covert Ops.png|20px]] [[Kris S]] | |||
</div> | |||
<div style="margin: 5px 25px 10px 5px; display: inline-block; vertical-align: top; text-align: center;"> | |||
[[File:Nodachi.png|link=Nodachi]]<br>XI [[File:ECM.png|20px]] [[Nodachi]] | |||
</div> | |||
<div style="margin: 5px 25px 10px 5px; display: inline-block; vertical-align: top; text-align: center;"> | |||
[[File:Nodachi_A.png|link=Nodachi A]]<br>XI [[File:Covert Ops.png|20px]] [[Nodachi A]] | |||
</div> | |||
<div style="margin: 5px 25px 10px 5px; display: inline-block; vertical-align: top; text-align: center;"> | |||
[[File:Nodachi_EW.png|link=Nodachi EW]]<br>XII [[File:ECM.png|20px]] [[Nodachi EW]] | |||
</div> | |||
<div style="margin: 5px 25px 10px 5px; display: inline-block; vertical-align: top; text-align: center;"> | |||
[[File:Kevlar_Ha.png|link=Kevlar Ha]]<br>XII [[File:ECM.png|20px]] [[Kevlar Ha]] | |||
</div> | |||
<div style="margin: 5px 25px 10px 5px; display: inline-block; vertical-align: top; text-align: center;"> | |||
[[File:Cutter.png|link=Cutter]]<br>XII [[File:Covert Ops.png|20px]] [[Cutter]] | |||
</div> | |||
<div style="margin: 5px 25px 10px 5px; display: inline-block; vertical-align: top; text-align: center;"> | |||
[[File:Wakizashi.png|link=Wakizashi]]<br>XIII [[File:ECM.png|20px]] [[Wakizashi]] | |||
</div> | |||
<div style="margin: 5px 25px 10px 5px; display: inline-block; vertical-align: top; text-align: center;"> | |||
[[File:Wakizashi_R.png|link=Wakizashi R]]<br>XIV [[File:Covert Ops.png|20px]] [[Wakizashi R]] | |||
</div> | |||
<div style="margin: 5px 25px 10px 5px; display: inline-block; vertical-align: top; text-align: center;"> | |||
[[File:Wakizashi_AE.png|link=Wakizashi AE]]<br>XV [[File:ECM.png|20px]] [[Wakizashi AE]] | |||
</div> | |||
<div style="margin: 5px 25px 10px 5px; display: inline-block; vertical-align: top; text-align: center;"> | |||
[[File:Karud.png|link=Karud]]<br>XV [[File:ECM.png|20px]] [[Karud]] | |||
</div> | |||
<div style="margin: 5px 25px 10px 5px; display: inline-block; vertical-align: top; text-align: center;"> | |||
[[File:Caltrop.png|link=Caltrop]]<br>XV [[File:ECM.png|20px]] [[Caltrop]] | |||
</div> | </div> | ||
</div> | </div> | ||
<!--/Jericho--> | |||
<!-- | |||
<div style="border-bottom: 1px solid #8E8E8E; font-size: 17px; padding: 0 0 5px; margin: 0px 0px 8px;">Jericho</div> | |||
--> | |||
Revision as of 12:28, 18 July 2016
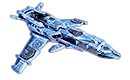
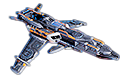
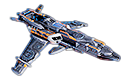
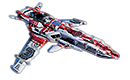
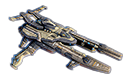
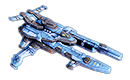
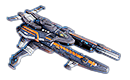
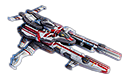
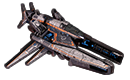
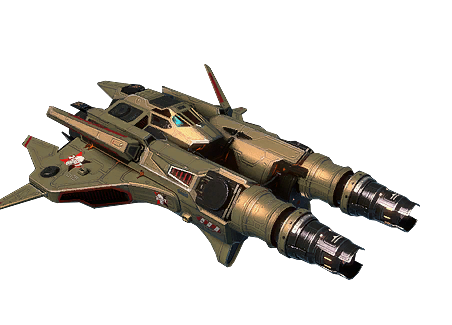
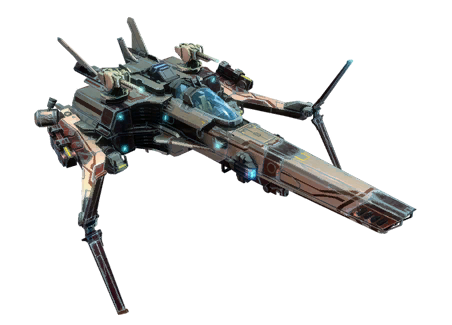
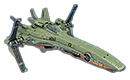
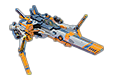
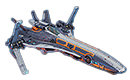
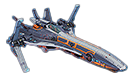
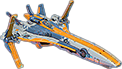
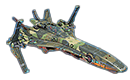
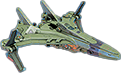
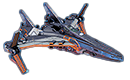
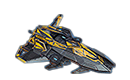
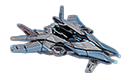
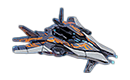
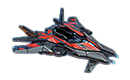
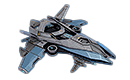
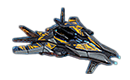
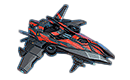
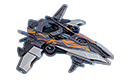
Interceptors are small, but very effective ships. It was designed for reconnaissance, electronic countermeasures or dealing damage to individual enemy ships. Armed with two guns and missiles.
Roles
Recon
 Recon ships must infiltrate the enemy ranks and identify the locations of their ships. A special module allows them to move around the battlefield quickly, and their active modules allow them to detect enemy ships, including the invisible ones, and track locations of individual ships. In addition, Recon ships can briefly become invisible and sabotage the enemy's shields. They boast increased radar range and key objects capture speed. Recon ship pilots also receive additional rewards for all damage done to those targets identified by them.
ECM
 ECM ships are meant to use their active modules to interfere with the normal operation of enemy ships.
A special module can temporarily disable the systems of nearby ships, while making the ship impenetrable to return fire. Active modules can also impede the movement of enemy ships, as well as their use of weapons and combat systems. ECM ships can be used to drain the enemy's energy reserves. An ECM ship is always an important target for any enemy ships, so they have better defences.
ECM ships are meant to use their active modules to interfere with the normal operation of enemy ships.
A special module can temporarily disable the systems of nearby ships, while making the ship impenetrable to return fire. Active modules can also impede the movement of enemy ships, as well as their use of weapons and combat systems. ECM ships can be used to drain the enemy's energy reserves. An ECM ship is always an important target for any enemy ships, so they have better defences.
Covert Ops
 Covert Ops ships are designed for sudden hit and run attacks on individual enemy ships. A special plasma web allows these ships to cause damage to the enemy without any direct contact whatsoever, while the ship's guidance system grants more critical hits. Active modules can temporarily increase damage done by the main weapons, as well as prevent the enemy from locking on your ship.
Advice
Factions
Empire
II ![]() Dvergr
Dvergr
III ![]() Dvergr 2
Dvergr 2
III ![]() King Dvergr
King Dvergr ![]()

V ![]() Neutron
Neutron
VI ![]() Dwarf 2
Dwarf 2
VI ![]() Scout
Scout ![]()
VI ![]() Wasp
Wasp ![]()
VII ![]() Diamond Dwarf
Diamond Dwarf
VIII ![]() Swarm
Swarm

VIII ![]() Grim
Grim ![]()
IX ![]() Black Swarm
Black Swarm
IX ![]() Deimon
Deimon ![]()
X ![]() Magnetar
Magnetar

XI ![]() Tempest
Tempest
XI ![]() Nibelung
Nibelung

XII ![]() King Nibelung
King Nibelung
XII ![]() Leonina
Leonina ![]()
XIII ![]() Viking
Viking

XIV ![]() Storm Viking
Storm Viking
XV ![]() Jarl
Jarl
XV ![]() Berserker
Berserker
XV ![]() Cyning
Cyning
Federation

III ![]() Swift
Swift
III ![]() Kite-E
Kite-E ![]()
IV ![]() Swift-M
Swift-M
VI ![]() Hawk
Hawk
VI ![]() Swift Mk 3
Swift Mk 3
VI ![]() Superkite
Superkite ![]()
VII ![]() Hawk-eye
Hawk-eye
VIII ![]() Hawk-M
Hawk-M
IX ![]() Kite
Kite
IX ![]() Eagle-B
Eagle-B ![]()
IX ![]() Sai
Sai ![]()
X ![]() Kite-M
Kite-M

XI ![]() Swift Eagle
Swift Eagle
XI ![]() Eagle
Eagle
XII ![]() Eagle-M
Eagle-M
XII ![]() Konkistador
Konkistador ![]()
XIII ![]() Grey Falcon
Grey Falcon
XIV ![]() Spectre Falcon
Spectre Falcon

XV ![]() Falcon-M
Falcon-M
XI ![]() Golden Eagle
Golden Eagle ![]()
XV ![]() Peregrine
Peregrine
Jericho
III ![]() Dagger
Dagger

III ![]() Black Death
Black Death
IV ![]() Dagger AE
Dagger AE
V ![]() Dagger V
Dagger V
VI ![]() Stiletto
Stiletto
VI ![]() Talon
Talon
VII ![]() Stiletto AE
Stiletto AE
VIII ![]() Kris
Kris
VIII ![]() Ricasso
Ricasso
IX ![]() Kris AE
Kris AE
IX ![]() Spirit
Spirit
IX ![]() Nyx
Nyx
X ![]() Kris S
Kris S
XI ![]() Nodachi
Nodachi
XI ![]() Nodachi A
Nodachi A
XII ![]() Nodachi EW
Nodachi EW
XII ![]() Kevlar Ha
Kevlar Ha
XII ![]() Cutter
Cutter
XIII ![]() Wakizashi
Wakizashi
XIV ![]() Wakizashi R
Wakizashi R

XV ![]() Wakizashi AE
Wakizashi AE
XV ![]() Karud
Karud
XV ![]() Caltrop
Caltrop